

Top 10 Common Issues and Solutions Working with Autodesk Fusion CAD Tool
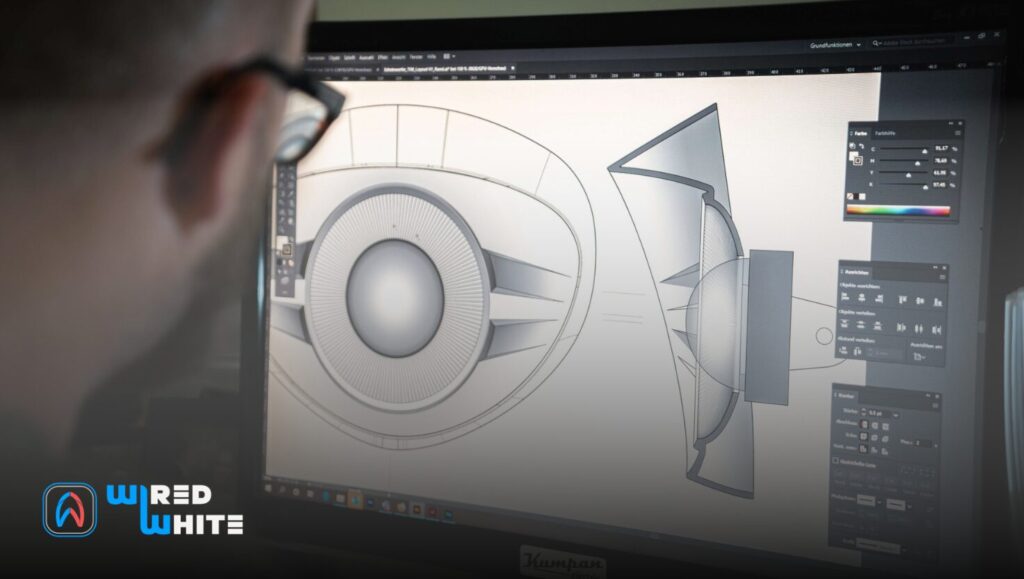
Autodesk Fusion 360 has become one of the most popular CAD tools due to its cloud-based nature, powerful modeling features, and integration with CAM, CAE, and collaboration workflows. However, as with any professional software, beginners and even intermediate users often run into recurring issues that affect design accuracy, workflow efficiency, and downstream processes like assembly, CAM, or 3D printing.
In this blog, we’ll explore the top 10 common issues in Fusion 360, explain why they occur, and provide practical solutions to help you avoid them.
Snap Sketch to Origin
One of the most overlooked practices in Fusion 360 is failing to anchor your first sketch point to the origin. The origin acts as a reference anchor for all subsequent features.
Why is it important?
If the sketch is not snapped to the origin, the entire geometry remains “floating.” This can lead to alignment issues during assemblies, dimensional inaccuracies, and problems with maintaining symmetry. In 3D printing, even a small misalignment can cause fitment errors.
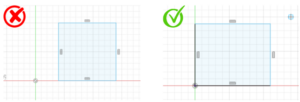
Solution:
Always ensure the very first point of your sketch coincides with the origin. By anchoring to the origin, you lock the sketch to a stable reference, preventing unwanted movement and improving overall accuracy.
Partially Defined Sketches
Fusion 360 allows you to draw sketches that are either fully defined (black) or under-defined (blue). Many users proceed with under-defined sketches, assuming it won’t cause major problems—but it often does.
Why is it a problem?
Partially defined sketches can cause timeline instability, alignment issues in assemblies, errors in downstream CAM operations, and inaccuracies in 3D printing. When collaborating with others, such sketches make it hard to maintain consistency.
Rule of Thumb:
“Black is Good, Blue is Bad.” Always ensure your sketches are fully constrained.
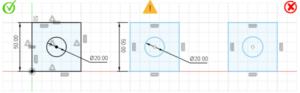
Solution:
Apply dimensions and geometric constraints until the sketch turns black. This guarantees stability and prevents future errors when editing or updating features.
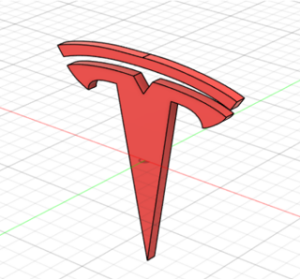
Pattern Dilemma
Fusion 360 allows users to create patterns either within sketches or as features. Beginners often apply patterns at the sketch level, which creates unnecessary complexity.
Why is this wrong?
Sketch-level patterns only duplicate geometry and do not carry the intelligence of features. On the other hand, applying patterns at the feature level (after extrusion, cut, etc.) performs a Boolean operation, which integrates properly into the model.
Solution:
Always apply patterns at the feature level rather than the sketch level. This makes the design cleaner, easier to edit, and more efficient.
Sketch-to-Feature Flow
A common mistake is trying to create an entire design from a single sketch. Students often draw overly complex sketches and then attempt to extrude everything at once.
Why is it a problem?
This approach makes the model difficult to modify, especially for stepped geometries or multi-body parts. It also creates unnecessary dependencies in the timeline.
Solution:
Follow a sketch → feature → sketch → feature workflow. For example, draw a base sketch, extrude it, then create another sketch on the new face for additional features. This step-by-step process ensures parametric clarity and avoids confusion.
No Profile, No Extrude
Sometimes, when you try to extrude a sketch, Fusion 360 does not recognize a closed profile. This usually happens due to very small gaps in the sketch geometry, which can be nearly invisible to the naked eye.
Why is this an issue?
Even a tiny opening prevents Fusion 360 from identifying the area as a closed profile, halting the extrusion. This is especially common when tracing over imported canvases or images.
Solution:
- Zoom in and carefully inspect the sketch for gaps.
- Use construction lines or temporary “V” shaped lines to identify the opening.
- Use the Extend or Trim tools to repair the sketch.
By ensuring your sketch profile is closed, you can proceed with extrusion seamlessly.
Using Offset with “0” Value
Manually recreating boundaries of existing features is time-consuming and error-prone. Many users don’t know that Fusion 360 allows you to use the Offset command with a zero value.
Why is it helpful?
It creates an exact copy of an existing edge or feature boundary instantly—without the need to manually redraw it.
Solution:
Use the Offset tool, set the distance to 0, and Fusion 360 will generate a perfectly identical sketch profile over the feature. This trick saves time and improves accuracy.
Common Sweep Mistakes
Sweep is a powerful tool for creating pipes, wires, rails, or any geometry that follows a path. However, users often encounter failures when attempting sweeps.
Common mistakes include:
- Path and profile not perpendicular to each other
- Profile not closed or too complex
- Path containing sharp corners
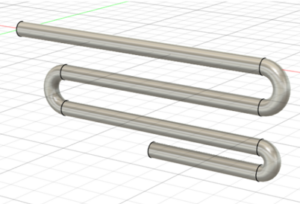
Solutions:
- Ensure the profile is perpendicular to the start of the path
- Simplify the profile for clean geometry
- Use Guide Rail or Path + Guide Surface for advanced sweeps
Following these practices prevents sweep failures and creates smoother designs.
3D Sketch Best Practices & Mistakes
3D sketches allow you to define curves and paths in multiple planes, but beginners often misuse them.
Common issues:
- Difficulty in controlling dimensions
- Accidental snapping to unintended planes
- Overcomplicating paths that could be created with simpler 2D sketches
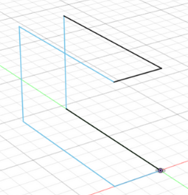
Solutions:
- Use 3D sketches only when absolutely necessary (e.g., for pipes, wire harnesses, or loft rails)
- Work plane by plane, and constrain dimensions carefully
- Keep paths simple to avoid instability
Difficulty Finding Joints, Motion Links, and Workshop Data
Fusion 360 has powerful assembly tools like joints, motion links, and animations. However, many students struggle to locate these tools or relevant datasets in the Data Panel.
Solution:
- Access the Data Panel (left-hand side) → Samples → Workshops & Events.
- Explore sample files that demonstrate joint types, motion links, and tangency relations.
- Practice with sample assemblies before applying them to your own projects.
- This hands-on exploration helps in mastering assembly features.
Autodesk Certified User (ACU) Exam Myth
Many students assume that Autodesk Certified User (ACU) exams are expensive, often thinking they cost between $100–$150. This misconception prevents them from validating their skills.
Reality:
The exams are much more affordable, usually under $25, if purchased through an Autodesk Authorized Training Center (ATC).
Solution:
- Locate your nearest ATC via Autodesk’s official website
- Purchase an exam voucher from the center
- Prepare using Autodesk’s free learning resources and practice tests
- By earning certification, you boost your professional credibility without breaking the bank.
Working with Autodesk Fusion 360 can be a smooth and rewarding experience if you avoid these common mistakes. By anchoring sketches to the origin, fully defining your sketches, applying patterns as features, and adopting a step-by-step sketch-to-feature workflow, you can eliminate most frustrations. Mastering advanced tools like sweep, 3D sketches, and assemblies will further elevate your CAD skills.
And finally, don’t fall for the myth about costly certifications—getting Autodesk certified is more affordable than most people think!


Responses