

How to create a course. The ABC of online courses.

Our platform upgrade offers our engineering and IT experts the possibility to create and sell your own online courses on our platform. In the following you will read what you need to do to start earning with your online courses on WiredWhite learning platform.
- 1. Accessing the instructor tool in the Course Dashboard
- 2. Creating a new course
- 3. Selling a course
- 4. Commission and money withdrawal
1. Accessing the instructor tool in the Course Dashboard
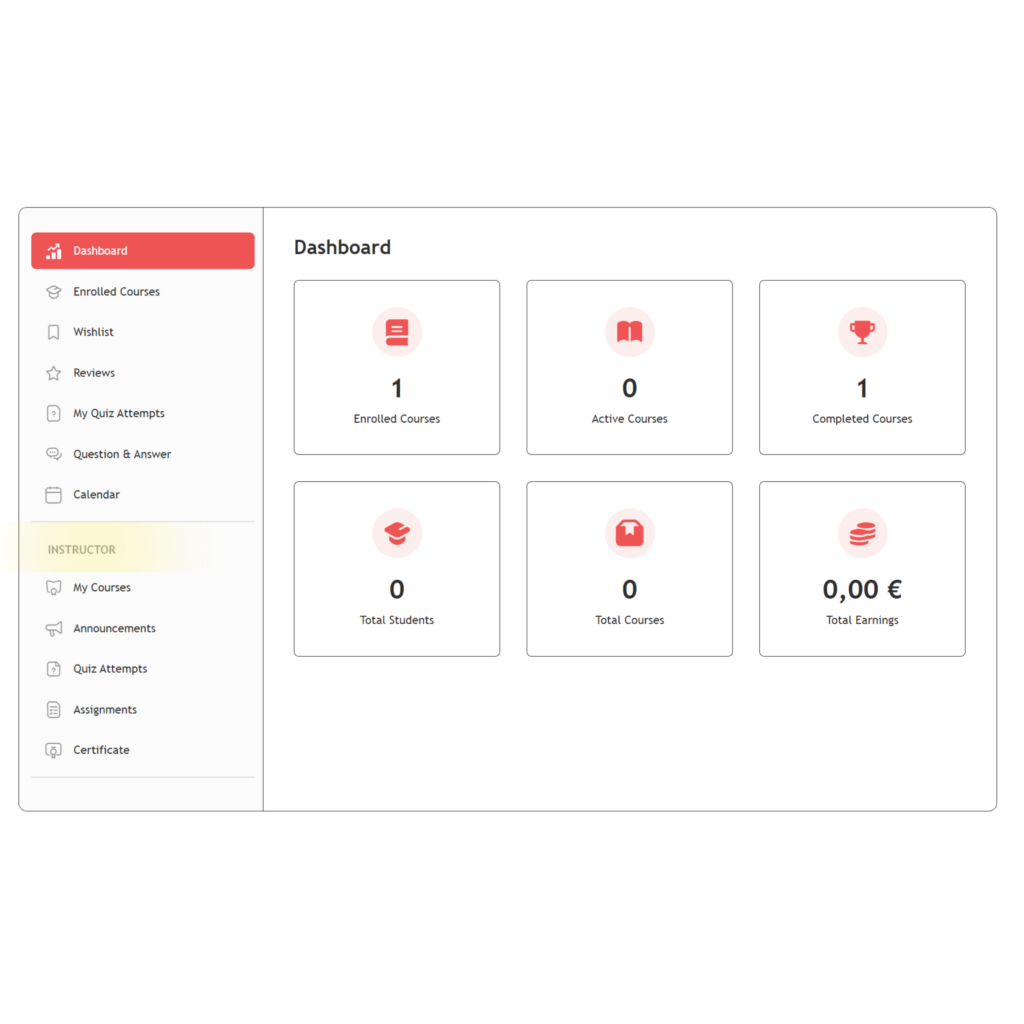
In order to access the instructor features in the course dashboard, log-in to your account, navigate to the menu on your left-hand side and click on the icon “Course Dashboard”.
Please click on the button “Become an instructor” to request the activation of the course creation tool for your profile

Once your request was submitted, we will shortly review and grant you the permission.
Now you have full access to the course creation tool and an extended menu on your course dashboard page
2. Creating a new course
An online course is a set of topics and lessons with the aim to provide knowledge in a structured way to students all over the world.
To create a new course, click on the button “+Create a New Course” located on the top right corner of your Course Dashboard.
You can always pause the course creation by saving it as a draft and continue working on it at a later stage.
2.1 Course info
The course info is highly important to make sure that students feel attracted by your course, as the information will appear on the course overview page.
Please indicate an attractive and comprehensive course title, a course slug, and a course description.
The course slug is recommended to be very similar or equal to your course title. To increase the visibility of your course in search engine results pages, it’s important to make sure that the Course Slug is relevant, contains relevant keywords, and that each word is separated by hyphens.
2.1.1 Course settings
Use the course settings section to make sure that the course set-up suits your preference. You can set-up the following items:
Maximum students: Number of students that can enrol in this course. Set 0 for no limits.
Difficulty level: Difficulty level settings for course enrolment allow the instructor to categorize the course into different levels of complexity, making it easier for students to choose the right course for their skill level.
Enrolment expiration: Student’s enrolment will be removed after this number of days. Set 0 for lifetime enrolment.
Public course: When the public course option is activated, it makes your course available for anyone. This means that the course can be accessed by anyone who has the link to the course page, and they do not need to log in to view the course content. We do not recommend using this option in case you are aiming to sell your courses.
Q&A: Enable Q&A section for your course.
Content drip: When the Content Drip is enabled, it allows instructors to release course content to students gradually over a specified period of time:
- Schedule Course Contents by Date:This option requires you to set a date for every single lesson, quiz, and assignment. If you do not set a date for a lesson, then it will appear instantly after the student enrols.
- Content Available After X Days From Enrolment: Enabling this option will add a number field to all content forms where you can set how many days it will take to unlock it. The starting date is the student’s enrolment date and will be counted from then onwards.
- Course Content Available Sequentially: This is the simplest setting. After enabling this option, you will not see any option inside lessons, quizzes, or assignments. Because when one lesson is completed, the next one appears. That means this option checks for the completed status for the lesson, attempt status for the quiz, and submit status for assignments.
- Course Content Unlocked After Finishing Prerequisites: After enabling this option, you will be able to see the list of the pre-existing lessons and other content and select the ones required. Without completing those, the lesson will not be published for the student. You can set lessons, quizzes, and assignments as a prerequisite. If a student attempts a quiz, he/she will be allowed to move on to the new lesson or the following quiz or assignment. Passing the quiz is not required, unless you specifically set it up in the quiz settings.
2.1.2 Course category
Use this setting to specify what category this course belongs to. You can choose from this list of categories:
- Electrical engineering
- Mechanical engineering
- Mathematics
- Mechatronics
- Robotics
- Mechanical Design
- Software Development
It is essential to indicate a category to make sure that students will easily find your course when searching on your course page.
2.1.3 Course price
In this section you can choose whether you want to offer your course for free or sell it. When clicking on the checkbox “paid”, you will be able to specify the course regular price and discounted price, if needed.
Please also read the instructions in the chapter about selling a course.
2.1.4 Course thumbnail
Upload a course thumbnail to make your course page visually appealing to potential students. The thumbnail should represent the content of your course and be of good quality. We recommend a size of: 700×430 pixels.
2.1.5 Course intro video
If you want to increase the probability of students choosing your course, it is recommended to upload a course intro video.
In this video you can briefly illustrate what the course is about and what students will learn, as well as present yourself and your expertise.
You can use either YouTube of Vimeo as a source. To use it, just upload your video to your personal YouTube or Vimeo account, copy the video’s URL and insert it in the course intro video field of the course editor.
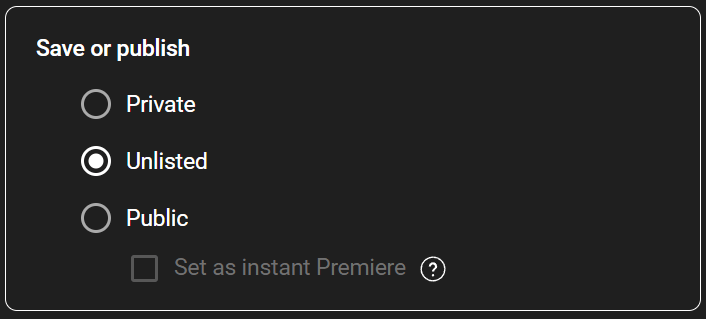
When using YouTube/Vimeo, please make sure that the visibility setting of your video is set to ”Unlisted”. This way you will make sure, that the video is hidden from the public, but will be visible on the course page.
2.2 Course builder
In the course builder section, you can set-up the entire structure and content of your course.
2.2.1 Topics
A course typically consists of several topics. Topics help to keep a course structured, thereby enhancing the learning experience for your students.
You can add a new topic by clicking “Add new topic”.
Within each topic there are usually several lessons. It is recommended to have 2 to 5 lessons and 1 to 3 quizzes per topic for optimal results.
2.2.2 Lessons
Each lesson typically consists of:
- Lesson name
- Content
- Lesson video: use YouTube or Vimeo to integrate the lesson videos. Details about the video upload, read also in chapter 2.1.5
- Attachment: use the attachment option to upload your presentation slides or exercise files.
To save your changes, click on the “Update Lesson” button.
2.2.3 Quizzes
A quiz is a test that can be integrated after each lesson or each topic. The quiz usually automatically provides the correct answers to students without the need for the instructor to interfere. This can be in form of multiple choice, true/false, single choice, fill in the blank, etc.
Enter for each quiz a title and a short summary.
In the following each quiz option will be explained in more detail.
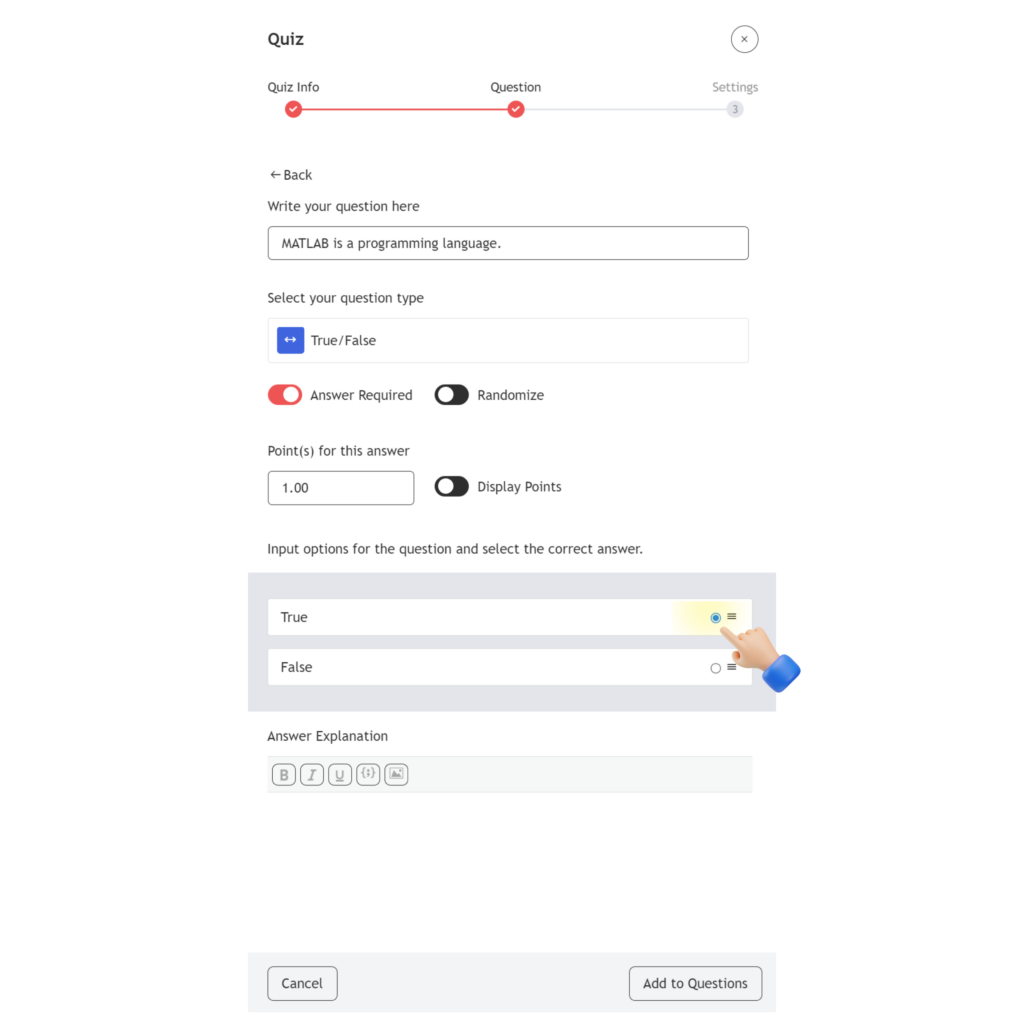
2.2.3.1 True/False
Select the True/False option in the question type selector. Write your question and use the radio button to indicate whether the correct answer is true or false.
2.2.3.2 Single choice
The single choice option is used when you want to have a multiple-choice question, but only with 1 correct answer.
Add your question at the top and add your answer options. In the answer options you can choose between only text/only image or a combination of both.
Please make sure that you have selected the right answer option, by clicking on the radio button.
2.2.3.3 Multiple choice
The multiple-choice quiz is used when you want to have several correct answers for one question.
If you are making use of the Points system, students will get full marks only if they select all the right answers while answering the question.
Add your question at the top and add your answer options. In the answer options you can choose between only text/only image or a combination of both.
Please make sure that you have selected the right answer options, by clicking on the check boxes.
2.2.3.4 Open ended
A long answer question type where students can give descriptive answers as this field can have a larger character limit.
To define this character limit, go to Quiz Builder > Settings > Advanced Settings and find the Open-Ended/Essay questions answer character limit field.
2.2.3.5 Fill in the blanks
Add your question with a underline in the place where the student must fill in the missing word: “MATLAB is a high-level _______ designed for engineers and scientists that expresses matrix and array mathematics directly.”
When adding the answer option type your entire question again under Question Title and replace the blanks with the variable {dash}: “MATLAB is a high-level {dash} designed for engineers and scientists that expresses matrix and array mathematics directly.”
Below that field, define your Correct Answer(s). E.g: programming language
When using several blanks in one sentence, define them in your Correct Answers each separated by a vertical bar “|”.
2.2.3.6 Short answer
This question type is similar to “open ended” but offer less space for answers. Hence, use it, when you really want just a very short and precise answer from your students.
You can define the character limit in the Quiz Builder> Settings > Advanced Settings under the Short answer characters limit.
2.2.3.7 Matching
Use this answering category if you want to set a question pattern where students must match the answers.
To do this, enter your question/quiz instructions and click on Add an Option. Enter your answer and its matched answer. You can also upload an image along with the answer.
Select the display format you prefer and repeat these steps to add more options.
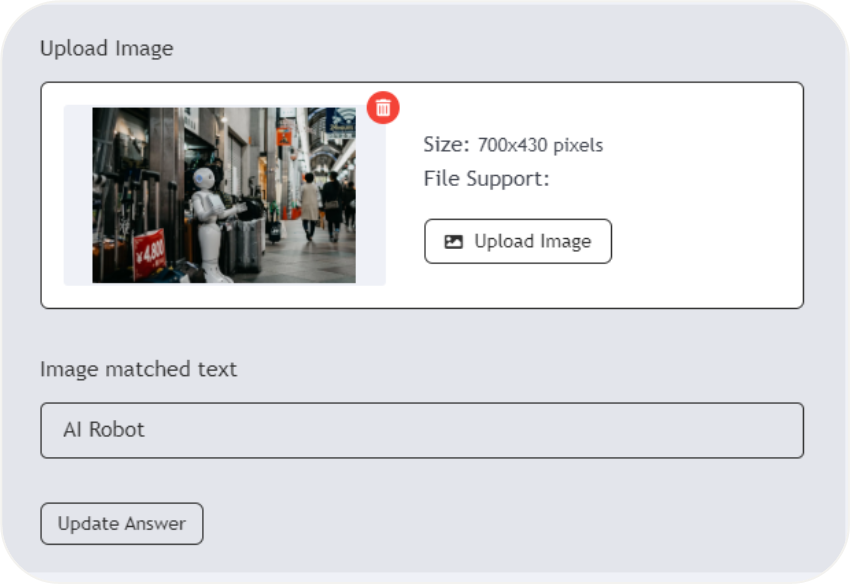
2.2.3.8 Image matching
Use this quiz type to enable students to match an image to the correct text.
To implement this, enter your question, click on Add an Option and upload your image, enter its matched answer and click on Update Answer. Repeat these steps to add more options.
2.2.3.9 Image answering
Use this quiz type to make students answer questions based on images.
Similar to Image Matching, click on Add an Option and upload your image and then enter its corresponding answer.
Lastly, click on Update Answer and repeat these steps to add more options.
2.2.3.10 Ordering
Set an ordering question where students have to reorder the given text, images, or both in the correct sequence.
Click on Add an Option and enter your first answer item under the Answer Title field. Like the previous question types, you can also upload an image to go along with this.
Repeat these steps to add more items and make sure to add them in the right order.
Generally: You can always choose to make answering the questions mandatory, assign points to correctly answered quizzes and provide answer explanations.
2.2.3.11 Quiz settings
When you have set-up your set of quizzes, you can always specify the conditions of the quizzes, such as:
- Time limit: Time limit for this quiz. 0 means no time limit.
- Feedback mode: define when to show the student the correct answer and whether he or she can take another attempt.
- Define a passing grade, in case you are using the Points system.
- Advanced settings: character limits for text quizzes, question layout, etc.
2.2.3.12 Reviewing a quiz
You can always review the quiz performance of your students by going to your Course Dashboard > Quiz Attempts.
When clicking on the specific quiz attempt of a student, you will be able to see the details and also provide your feedback to students when reviewing their quiz results.
2.2.4 Assignments
An assignment is a more complex homework for students, which they must upload. The instructor must check and provide feedback to the students. An assignment can also be integrated either after each lesson or at the end of each topic. Alternatively, it can be added at the end of the course.
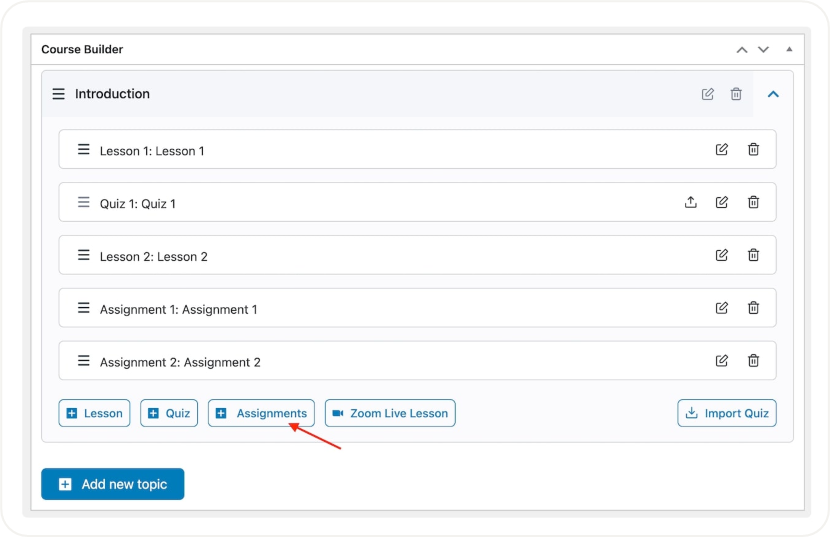
2.2.4.1 Creating an assignment
Open any course in edit mode (or create a new one). Under the course builder section open any topic and you’ll see a button named Assignments.
This will open a new popup window. Fill in the following necessary information:
- Assignment Name: Enter a name for the Assignment.
- Summary: Explain the task under the summary field. As this is a text editor, you can use the tools to format the text, add links, and also add media.
- Attachments: If you want to provide sample questions, research papers, or any kind of additional instructional resource, you can attach those files by clicking on the Upload Attachments button.
- Time Limit: Set the Time Limit of the Assignment. This will be applied as soon as the student views the Assignment on the Course Journey Page. You can set any number starting from zero. Here, zero means no time limit. You can then select a unit from the dropdown beside this field. Options include Weeks, Days, and Hours. After the time limit is over, the student will not be able to upload any files on the Assignment section nor submit the Assignment.
- Total Points: Define the total marks a student can obtain by completing this Assignment here. You can set any number larger than zero.
- Minimum Pass Points: Define the minimum mark to be obtained to pass this Assignment. You can set any number larger than zero and smaller than or equal to the Total Points defined earlier.
- Allow to Upload Files: Set any number larger than zero if you want to allow the students to upload files. If you don’t want the students to upload any files and just type the text on the submission page, then set this to zero.
- Upload File Size Limit: Define a File Size Limit (in Megabytes) here for the files students will upload for this Assignment. You can specify any number larger than zero. This field helps restrict the upload of any file that exceeds this limit.
Finally, add this new Assignment to your course by clicking on the Update Assignment button.
2.2.4.2 Evaluating assignments
Assignments require your active evaluation and feedback to the students.
To view all Assignments, go from your Dashboard to the Assignments menu item. Then, simply click on the Details to see the submissions.
Once you’ve entered the Assignments Evaluation Panel, you’ll first be greeted with basic details about the Assignment like Course Name, Student Name, and Submitted Date.
Then, you’ll find the student’s typed answer in the Assignment Description section followed by the files they uploaded which you can download and view by clicking on the download icon.
Lastly, you can submit your Evaluation of the Assignment by filling in the Evaluation Form.
Your Points: Enter the total points you want to award for this assignment. The tooltip beside this field will let you know what the Total Points are for this assignment, and you can award anything between 0 and this number.
Feedback: You can use this field to share your thoughts on this Assignment.
To finish off, submit your evaluation by clicking on the Evaluate This Submission button.
Students will receive an email notification with your feedback.
2.3 Instructors
When creating a course, you automatically are the author and the only instructor of a course.
In some cases, you might want to manage a course together with a co-instructor. In this case you can use the “Add instructor” button to add another instructor to the course.
Please be aware that you will only find those instructors who have access to the instructor tools, as described in chapter 1.
2.4 Additional data
The additional data section is used to add more information for students to help them evaluate whether your course is a good option for them. We therefore, highly recommend indicating as much details as possible.
- What Will I Learn?: List the knowledge and skills that students will learn after completing this course. One per line.
- Targeted Audience: Specify the target audience that will benefit the most from the course. One line per target audience.
- Total Course Duration: Specify the overall duration of the course, i.e., how long it will generally take for a student to complete this course.
- Materials Included: A list of assets you or the instructors will be providing for the students enrolled in this course. One per line.
- Requirements/Instructions: Add any additional requirements or special instructions for the students (e.g. some specific software). One per line.
- Course Tag: choose the most suitable keywords for your course from our list of available tags. Students might look for courses filtering by tags.
2.5 Course certificates
The Certificate Template section provides the ability to select a certificate template for students to receive after they have completed the course. You can choose between a set of pre-designed templates in landscape or portrait format.
Alternatively, you can create your own certificate by doing to your course dashboard > Certificate and clicking on “Create certificate”.
2.6 Publishing a course
When you have finalized a course, simply click on “Publish”. However, before your course is published it will be submitted for final approval to us. Once we have approved, you will be notified via email and your course will appear on our course page.
3. Selling a course
When your course is published, it will appear not only on our courses page but also in the Products tab on your profile.
This means, that the course has been added as a product to your store manager. From here you can manage the course orders and monitor your earnings. For more details, refer to our article about the store manager.
4. Commission and money withdrawal
For commission and money withdrawal the same regulations apply as for your Individual Request product in your store. The commission on each purchase is 0.25€+5% plus 19% fee tax.
Hence, if you sell your course for 100€, then from a course purchase 6,20€ will remain as our admin fee and 93.80€ will be your earning.
You can request a withdrawal of your earnings via Bank Transfer, Stripe or PayPal. Please be informed that when using Bank Transfer, we will charge additionally 5€+1% for each withdrawal.
To find out more details about money withdrawal, please visit the payments chapter here and read about the payment methods here.


Responses